Okay, so I took a class last summer at Sunstone Herb Farm in Albuquerque on fermentation. It was actually called something like the lacto-fermentation workshop, and silly me, I thought it was going to be about cheese making. Well, it wasn’t but that was okay. (Kevin’s the cheese maker anyway.) We did stay in the same genre, the ancient art of preserving food through fermentation, only the class focused on vegetables more than cheese curds. So why, lacto-fermentation? Lactic acid is what forms when lactic bacteria transform carbohydrates during fermentation. It inhibits the growth of other non-desirable organisms in fermented food.
My favorite fermented food is sauerkraut, although Kimchi comes in a close second. Maybe it is my German heritage that kindles my fascination. I haven’t always loved sauerkraut, actually, the pungent smell of sauerkraut wafting through the house on holidays usually brought more dread than joy. Oh, the horrible flavor, strong and inescapable, not to be dulled even by mixing it in tiny pieces with the rest of my food… the smell lingering for hours before meals, tormenting me with what I would soon be forced to eat.
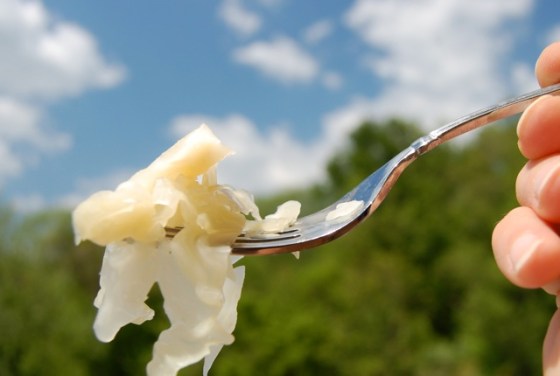
I stared dubiously when the sauerkraut was offered in class. But I had liked the fermented beets I’d tasted a moment earlier, and I am not usually a fan of beets. I braced myself, and as the sauerkraut met my tongue, the tangy, unusual taste brought me, not pain, but a surprising enjoyment. This was not the sauerkraut of my childhood, a putrid, limp vegetable preserved in vinegar and frozen until dumped into a pot of steaming water. This was the sauerkraut of my grandmother’s childhood, in the Deutschland region, where neighbors set giant vats of cabbage out on the porch, covered it to protect it from bugs, and allowed it to sit for months until the flavors developed a depth and robustness envied by the frozen cabbage packets of my childhood.
We as a society tend to fear anything that sits out on our counter for too long. We don’t want any of that horrible bacteria to grow. Our obsession with germs has reached almost epic proportions, as we pasteurize our food, sanitize our hands, and use antibacterial soap, antibacterial spray, and Clorox to rid ourselves and our environment of the “nasties”. Well, it’s a bit unfortunate since not only the earth, but our bodies, are teeming with bacteria, beneficial and otherwise. They’ve found bacteria living in clouds that may cause rain. Soil bacteria is important for growing healthy food. Bacteria in water helps clean it. There are more bacteria then cells in the human body. Remember that useless old organ, the appendix? Not so useless after all; turns out it’s a reserve for good bacteria in case a bug wipes out the bacteria in the body necessary for human survival. That last part of the previous sentence is worth reading twice.
See, bacteria like lactobacillus acidophilus can be our friend. As every yogurt maker has been sure to inform us in recent years, digestive health, even immune functioning has been linked to the role of good bacteria in our gut. Of course, now they make the yogurt, pasteurize it, and add the good bacteria back. Before pasteurization people left milk on the counter to sour -hello, sour cream. Don’t try this today with your pasteurized milk- once the bacteria is zapped there is no good bacteria left either and that’s what you need.
I have even heard someone connect the widespread use of antibiotics with the sharp rise in allergies. We need those little guys, and people seemed to have a better feel for this in the olden days. Or maybe they were just hungry, and really, really wanted to preserve their food.
Well, whatever it was, it worked because sauerkraut is just teeming with lactic acids. The secret? Salt. Salt wards off bad bacteria, and allows the good stuff (lactic bacteria) to flourish. If you get nervous at the thought of leaving food to get funny smelling after days on the counter, soothe yourself by using the maximum quantity of salt. If you are avoiding high levels of salt in your diet, use the lower amount. This ferments best at 70-75 degrees Fahrenheit. Warmer temperatures will decrease fermentation time & increase the possibility of mold. And mold, my friends, is how you will know if your sauerkraut has gone awry. If it has anything funny growing on it, toss it. Same with any weird color changes. It’s easy and cheap to start again. And if your boyfriend has introduced blue cheese mold into your house as a result of his cheese making efforts, good luck to you because that persistent mold just may find its way onto your sauerkraut, and other things in your fridge, like your butter. I highly recommend blue-cheese making outside of the house.
Now that we are back on the east coast, my grandmother is anxiously awaiting the arrival of my latest sauerkraut batch (ok, maybe that’s an exaggeration) and I sincerely hope she approves! Then, I will know I have the true German stamp of approval.
For more recipes or all around experimenting with clever bacteria see Sandor Ellix Katz’s book Wild Fermentation. He’s also got a great website with a fermentation support forum. I’ve had success with the kimchi recipe, kombucha, and also fermented beets. In the near future, I hope to try kefir if I can get my hands on some grains.
Now, for any of the brave souls who may be willing to try the sauerkraut, the recipe follows.
Traditional Fermented Sauerkraut
Ingredients:
1 large Head of Cabbage. If they are smaller sized you can use two. Use the freshest organic cabbage you can find. The fresher, the healthier, and the more juice. Organic means it has been grown without harsh chemicals, but that’s another whole topic.
1-2 Tablespoons of sea salt – You can also use pickling salt. Do not use Iodized salt, as the added iodine is anti-microbial. You may need a few more tablespoons of salt if you need to make brine.
Water for the brine- You need un-chlorinated water as chlorine will kill bacteria. If you are using tap water, boil out the chlorine for at least ten minutes, or allow the water to sit for 24 hours to off gas the chlorine before use.
Equipment:
Knife
Cutting Board
Large Bowel
Wooden Spoon or Old-fashioned Meat Hammer
2 Quart Canning Jar (or 2 one quart jars) You can use crock pots or other containers, smaller or larger if you’d like, just adjust the recipe. I heard in the old days people put sauerkraut in giant wooden tubs, and can’t help but wonder if that added to the flavor. Of course, today most wood is treated so watch out for that.
Small Sealable Plastic Bag
Instructions:
1. Now, first I wash all my utensils carefully with soap and hot water, making sure to rinse off all the soap. Soap residue can interfere with the bacteria. Then, I pour boiling water over everything and put them on a rack to dry. When all the water has dried inside the jar and lids, I am ready. I don’t know if this passes food safety regulations. If that goes past your level of comfort, you may want to sterilize all your equipment the professional way- which I think involves boiling the stuff in water for a while. It’s up to you to do that research. I also thoroughly wash my hands before beginning.
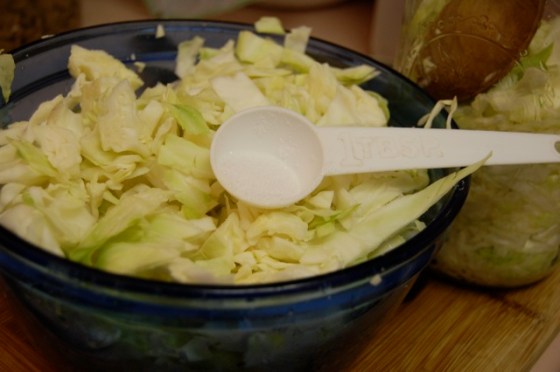
2. Thinly slice the cabbage. I like my pieces fairly small, so as to eat them in one bite. I also like to include the thicker pieces of cabbage towards the center and bottom for a little extra crunch, but if you don’t leave them out.
3. Put a little bit of cabbage into large bowl and cover with a little bit of salt. Repeat until all the cabbage and salt is in the bowl.
4. Pack cabbage into the jar, putting a little bit in at a time and pushing down with the wooden spoon before adding more. You are pushing down on the cabbage to release the juices. If you are using a metal meat hammer be careful here; you don’t want to smash the glass.
5. If the juice is not covering the cabbage, you will need to cover it (see step #7) and check it throughout the day. Press it down more each time. This and the salt will help draw the juices out over time. If, by the next day, the cabbage juices still don’t cover the cabbage, add a bit of brine to cover it. Brine is made by dissolving 2 TB iodine free salt to 1 quart of chlorine-free water.
6.Cover with a plastic bag filled with brine. This will keep the cabbage submerged under the brine, which is important because you don’t want cabbage poking up out of the salt water- it may cause spoilage. Use brine, because if your bag happens to leak, it will not effect the sauerkraut. If you have a bigger container with a wider lid, you can use a plate weighted with a water-filled jar to keep it down.
7. Cover your jar with a clean towel or cheesecloth and rubber band in order to keep the bugs out. Flies spit or do something that changes the acidity of the fermenting food and we don’t want that spoilage.
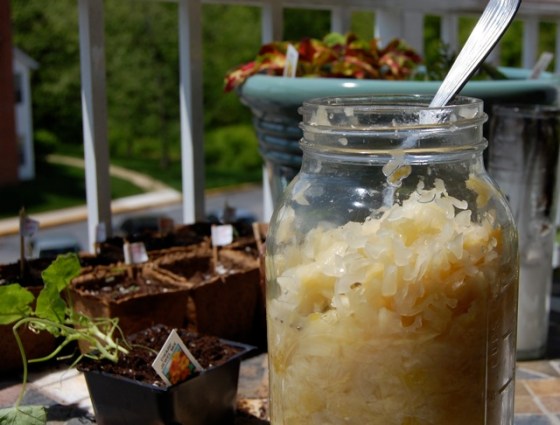
8. Let jar sit on the counter for 3-5 days. You will start to see little bubbles- that means it’s fermenting. You must check daily for any bacteria scum floating on the top and skim it off if it appears. This is normal, so don’t be worried about that. Ferment time will depend on temperature, faster if it is warmer.
9. You can get rid of the towel/cheesecloth now. Put a lid on the jar and place it in the refrigerator or some other kind of cold storage. The bubbling will have slowed but it will continue to ferment in the fridge, just at a much slower pace.
You can eat it now if you like but the longer you let it ferment, the more the flavors will develop. I love to taste my sauerkraut each week to see how the flavor develops.
Enjoy!
Related articles


I was actually thinking about making some sauerkraut the other day, but I couldn’t work up the enthusiasm to cook up the bland grocery store bag. (Or to cook at all, really, but that’s another story.) Sauerkraut is something that has definitely grown on me since childhood … love it in a casserole, with beef, maybe not your thing. But your ideas intrigue me, especially as it seems easy enough for the kitchenphobic/lazy.
Yes, it’s pretty easy, especially once you know what you’re doing. I’ve started to consider it a sort of interesting kitchen science experiment with results I can eat. Give it a try; Oma will be proud. And you know where to find me with any questions.
Pingback: Homemade Ginger Beer and other Natural Sodas- Fermentation Fun! | Inspirations and Explorations
I just bought 3 huge cabbages at a farmer’s market for 75 cents each. One is destined for the kraut. thank you for the recipe.
Elaine, that’s wonderful! I love hearing that a recipe is going to good use. I hope it turns out great for you. A fresh cabbage from the market should be perfect, as it’s very juicy. Please let me know if you have any questions!
I do a lot of canning. Is this a recipe I can put a sealed lid on?
I am not sure about the canning- it’s something I’ve never done but have been meaning to try. I’m guessing that if it requires a lot of heating some of the beneficial bacteria may be destroyed but that’s just me musing. They do sell jarred fermented sauerkraut in my local food co-op & those jars are obviously sealed, so maybe? Sorry I can’t be of more help, and best of luck with your sauerkraut making endeavors!!!
Love reading how you make your sauerkraut .
I thought back many years ago helping my mother make her kraut. She used a churn, YES A CHURN. We washed our cabbage and cut it up, we then put it in a churn and we poured salt on top of the cabbage. I don’t remember what the thing was called that went with the churn but we used it to mashed the cabbage in the churn. We would then cut more cabbage and add to churn and pour salt on top of the new cabbage added and then we would mashed all the cabbage and salt again. After we got out churn full we put the lid the fit the churn and cover it with a clean cloth. Everyday we would remove the cloth and mash the cabbage and salt more. We would do this for several days until my mom said it was ready to put in jars. Now so far I haven’t read this anywhere but I almost know my mother would then can her kraut in a canner. She would have many quarts because she always make a lot. My mother has since passed away and I just told my daughter the process she used to make kraut and she didn’t believe it could take that much work and time to make kraut. I goggle it to see if I could find a receipt. I did not find one where anyone used a churn and then can it. Has anyone of you ever used a churn and after churning it did you can it in a jar. If anyone can relate to this , please email me at sfh3180@gmail.com I really want to make some but maybe after all the years, I have forgotten some of the steps we used.
Thank you so much for anyone’s help.
Sarah Hill
Hi Sarah, wow, I love the story of you and your mother making sauerkraut in a churn! Thanks for sharing. I imagine it would make a lot of sauerkraut. I’m pretty new to canning, just experimented with some peach jam today. I believe the difference would be that canning would make the sauerkraut shelf stable and bypass the need for refrigeration, but also kill off a lot of (if not all of) the good bacteria. Since we make it for the benefits of the good bacteria, I haven’t tried that particular method. Someone out there must know though, and I hope you get a reply so that you can recreate that wonderful experience and maybe even pass on a great family tradition to your daughter. Best wishes!
Be careful! Natural sea salt contains Iodine, which isn’t bad for this job. The salt you shouldn’t use is Iodized Table Salt. Just never use this salt…Best would be Pink Him. Salt!
Thanks for the clarification- there are trace amounts of iodine in sea salt but not enough to effect fermentation. I have had great success with pink Himalayan salt and with the Celtic grey sea salt!
Working on my first batch. Very easy to prepare I used my food processor to shred the cabbage which went quickly. Used a large crock because I used two large heads of cabbage. Can’t wait to see how it turns out! I’ll keep you updated.
That’s great to hear! I haven’t tried it with a food processor but imagine that would really cut down on chopping time. Hope you’ll be enjoying some delicious sauerkraut very soon! Let me know if you have any questions.