

a lot of horse poop!
Okay, so last year had many failed attempts to convert the small acreage of usable land on our property to a lush gardening paradise. A brief list of the culprits would be: the dog that lived here before us (left an inch of poop on the dirt), our laziness (in not cleaning up that poop and rebuilding the soil), our newness to Southwest Gardening (very hot, very dry… xeriscape, alkaline soils- we are in Pennsylvania no more), and then there is of course, our dog (more poop, more urine, and he is a digger). Almost every plant we tried either died or got dug up, none of our seeds sprouted. Our garden was looking rather morbid this spring, read: patch of baked dirt.

Gardening Efforts Gone to Waste
Very depressing after all that time & money! So we decided to try again this year, but we were going to do things a little bit differently. So we tackled, first, our front lawn with the renewed gusto of spring.

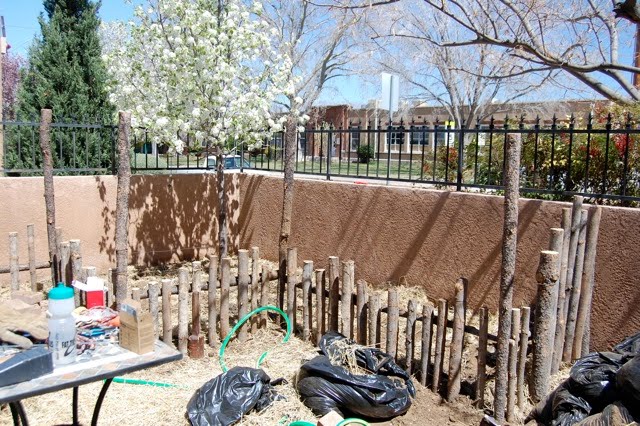
Building Our Fence
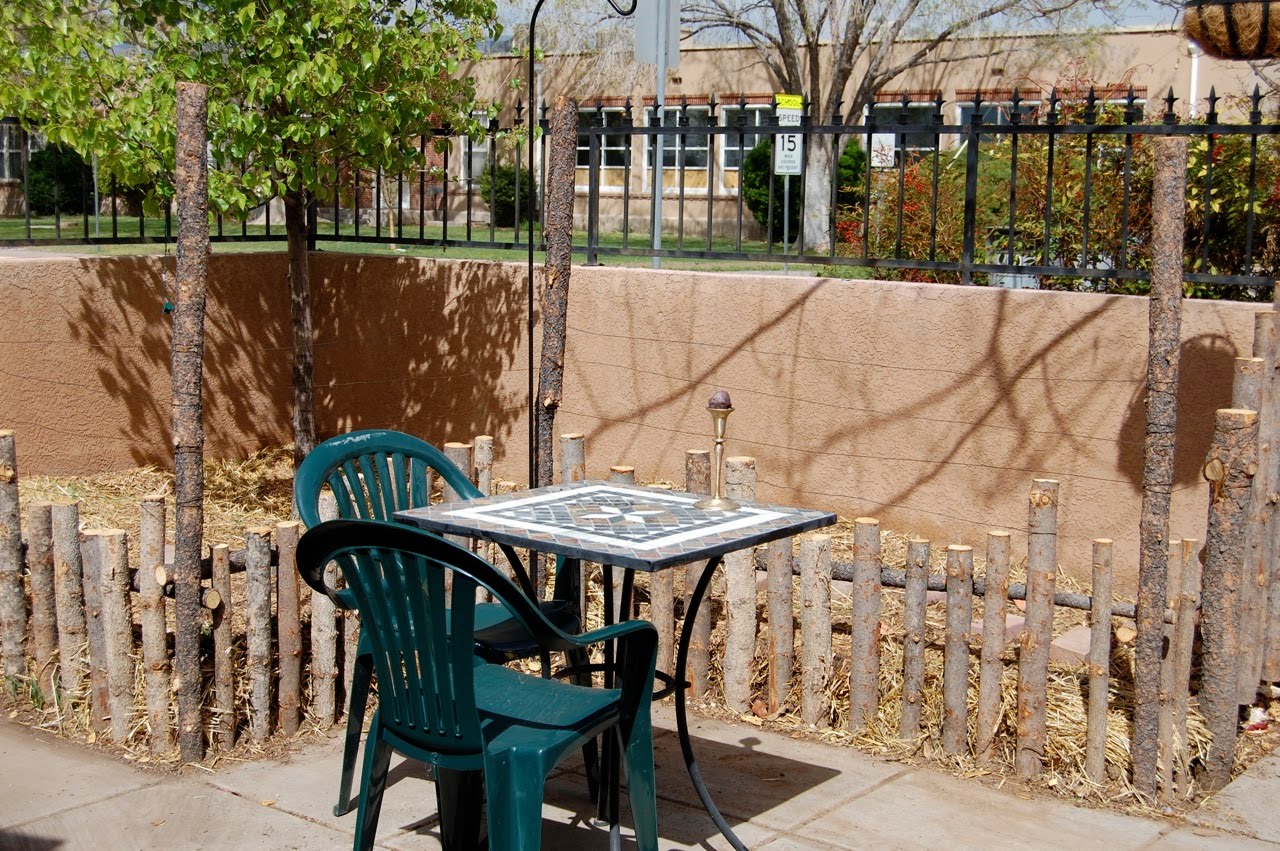
First on our priority list, a fence: a good, inexpensive, dog proof fence. Thank goodness we are in the southwest. All it took was some latillas (those are the round poles), some screws, some effort, oh, and some wire after the dog quiet easily soared over the top, and we were all set. Kevin hopes to add some solar lanterns, and we will trim the taller poles for aesthetic purposes.
Next we had to work on the soil. I had seen some amazing videos about Permaculture: permanent agriculture. It is a method of gardening Wikipedia describes as “an approach to designing human settlements and agricultural systems that mimic the relationships found in natural ecologies.” I had fallen in love with its principles, mainly “work with nature, not against it.” Gaia’s Garden is a great book and resource. A much more intense book is Bill Mollison’s Permaculture: a designer’s manual.
To begin we dug swales throughout our garden. Swales are long level ditches with a berm on one side, designed to catch and retain water in your landscape, crucial in the southwest. Since we had such limited space, our swales were thin and narrower than recommended. They ran through the garden, were filled with small rocks and stuffed with straw to hide their presence from the world. Given more space, I would have just fit them visually into the larger landscape, but we have less than a hundred square feet out front. The swales are designed to hold and deliver water where needed- important in the southwest. I would love to show you some pictures, but for some absurd reason, I forgot to take them at this point.

testing the soil- you can determine a lot by how the soil settles

Ph test for soil
Next, we really wanted to improve our soil. Healthy soil retains a lot of water, and can even be the equivalent of a two inch lake. After some testing we determined our soil had okay levels of almost everything but was off the charts on nitrogen (was anyone surprised?). At this point we decided sheet mulching over our soil would give the best long term results… So here’s a simple breakdown of what we did. I recommend Gaia’s Garden for a detailed explanation.
Step one: Get poop, and cover ground with thin layer. We found a neighboring horse stable on Craig’s List giving away free horse manure that had been aged two years. We also added some not quite ready compost full of chunks of veggies.

It helps to have a willing shoveler when on takes on a pile of horse manure!

that’s what in your trunk?

dog meet horse
Step two: Cover that with layer of cardboard or thick newspaper, overlapping edges by six inches (to kill weeds).

layer of cardboard and newspaper for sheet mulch
Step three: Another layer of poop.
Step four: Get straw bales and rip into one to two inch chunks, lay on ground in three layers. Mix in a little composted manure.
adding layers
Well, our garden looks very different already. And there is a whole new feel to our yard. When we go outside, it feels warm and comforting, in a way that wasn’t there before. So, how will planting go? I’m hoping for the best, but anything is better than last year!

tidied up nice & neat
ready to settle in for a while and wait for bacteria to form
Here’s a picture from the first year we planted our garden with no soil amendments. (sad looking, I know…) We had to water constantly to keep those plants happy in that parched ground.
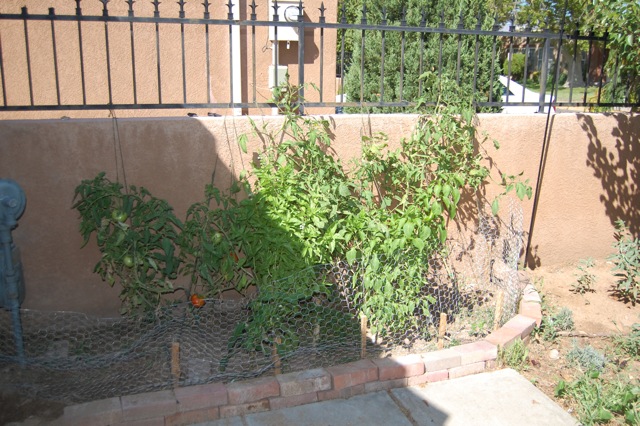
garden end of first year
And below is our garden at the end of our 2nd year. Much better water retention!! We put sheet mulch down beginning of April and I took this picture in October- so it had over 6 months for the straw to break down and the bacteria to develop. We had a lot of green and an overabundance of cherry tomatoes. Not as much of the bigger tomatoes- but it was a hard summer for them anyway. The soil was probably still very nitrogen rich. We didn’t really plant too much in the front- time & budget reasons. Best sheet mulching results are seen in two years, when the soil has had time to break down more, but we’ve already moved to a new place. I envy the new people who move in because it’s only gonna get better! I hope they’re gardeners. As for me, well, I just need a new property to start on.
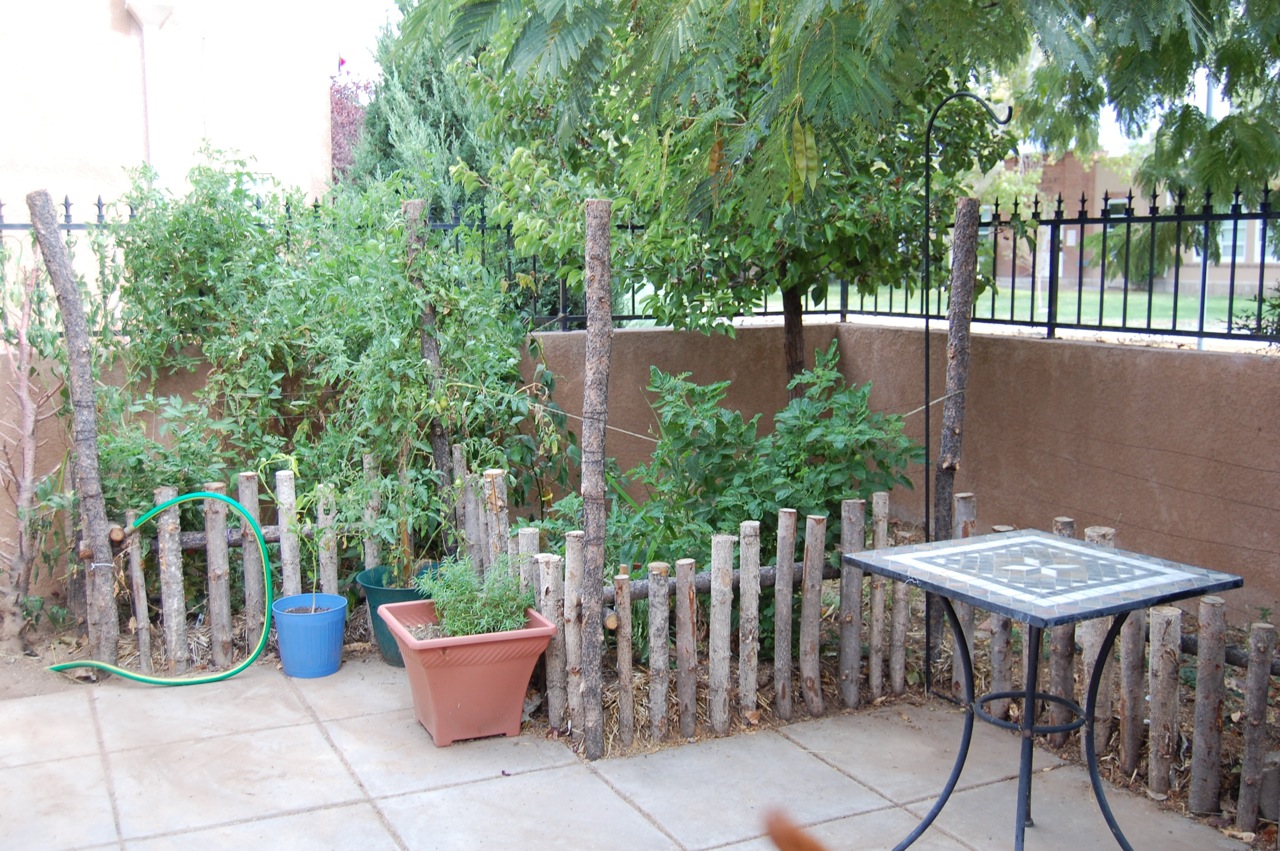
Permaculture After 6 months

Garden After Permaculture
